Cozy Cheeseburger Sliders: Your New Family Favorite
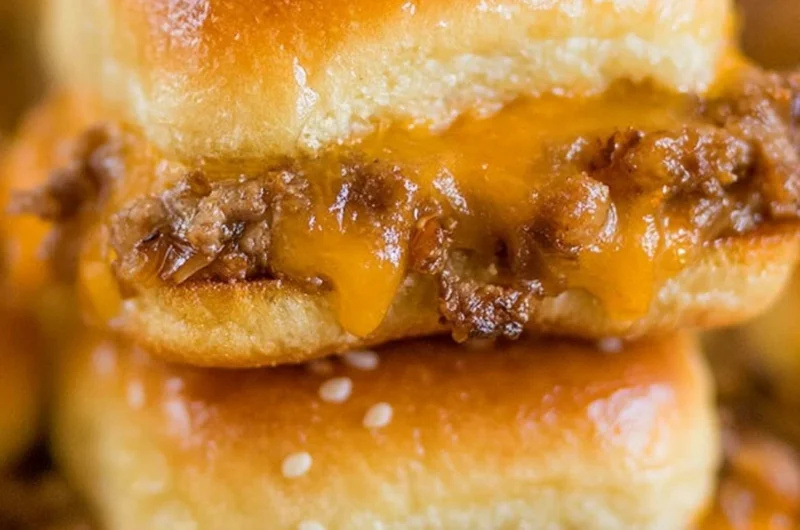
There’s something irresistible about the smell of sizzling burgers wafting through the air, isn’t there? It fills the heart with memories of summer barbecues and family gatherings, where laughter and delicious food come together in perfect harmony. As the cooler months approach, I find myself craving the comfort of a warm, hearty meal, and these Cheeseburger Sliders perfectly capture that nostalgic vibe. They’re not just any sliders—they’re tiny bites of joy, packed with creamy melted cheese and savory beef, creating a burst of flavors that feel like a warm hug on a plate.
Perfect for an easy weeknight dinner or a gathering with friends, these sliders are as satisfying as they are simple. Plus, you’ll love how quickly they come together! This is one you’ll definitely want to pin for later!
Why You’ll Love This Recipe
- Quick to Make: Ready in just 30 minutes, perfect for busy weeknights!
- Crowd-Pleasing: Everyone loves a good cheeseburger, and these sliders make serving easy.
- Kid-Friendly: Perfectly sized for little hands, they’re sure to be a hit with the kiddos!
- Customizable: Add your favorite toppings or sauces for a personal touch.
- Comfort Food: Packed with cheesy goodness, these sliders are sure to satisfy.
What You’ll Need for Cheeseburger Sliders
Gather these simple ingredients to get started:
- 1 pound ground beef
- Salt and pepper to taste
- 1 cup cheddar cheese, shredded
- 12 slider buns
- 1/4 cup mayonnaise
- 1 tablespoon mustard
- Pickles, sliced
- Lettuce, for serving
- Tomato, sliced
How to Make Cheeseburger Sliders
Let’s make this cozy dish together! Follow these simple steps to delicious perfection:
- Preheat the oven to 350°F (175°C).
- In a skillet over medium heat, cook the ground beef until browned, seasoning with salt and pepper to your taste.
- Remove from heat and stir in the shredded cheddar cheese until it melts into creamy goodness.
- Slice the slider buns in half and place the bottom halves in a baking dish.
- Spread mayonnaise and mustard generously on the bottom halves, creating a creamy base.
- Spoon the cheesy beef mixture over the buns, then top with pickles, lettuce, and tomato slices for that fresh crunch.
- Place the top halves of the buns snugly on the sliders.
- Cover the dish with foil and bake for 10-15 minutes until everything is heated through and the flavors meld together beautifully.
- Serve warm, and watch them disappear!
Fun Ways to Customize It
Once you’ve mastered the basic recipe, why not try these delicious variations?
- BBQ Sliders: Mix in some BBQ sauce for a zesty twist; top with crispy onion rings for added crunch!
- Spicy Sliders: Add jalapeños and pepper jack cheese to kick up the heat; a drizzle of chipotle mayo can take this over the top!
- Veggie Lovers: Swap out the ground beef for lentils or black beans for a scrumptious vegetarian option. Top with avocado for that creamy touch.
- Breakfast Sliders: Use scrambled eggs and crispy turkey bacon instead of beef for a fun breakfast treat!
Chef Emma’s Helpful Tips
- Make-Ahead Advice: Prepare the beef mixture in advance and keep it in the fridge. Assemble and bake just before serving!
- Ingredient Swaps: Feel free to switch up the cheese—Swiss or gouda would add a delightful twist.
- Storage Suggestions: Keep leftovers in an airtight container in the fridge for up to three days. Reheat for a taste of comfort anytime!
- Slicing Tricks: Use a serrated knife for cleanly slicing the buns and ensure even layering of ingredients.
What’s Inside – Nutrition Breakdown
Each slider is roughly a serving, and here’s the nutritional breakdown you need:
- Serving Size: 1 slider
- Calories: 260
- Carbohydrates: 22g
- Sugars: 2g
- Fat: 14g
- Protein: 12g
- Sodium: 350mg
Frequently Asked Questions
Can I make this ahead?
Absolutely! Prepare the filling in advance and just assemble and bake when you’re ready to serve.
Can I use different ingredients?
Yes! Feel free to mix up the toppings or swap beef for a different protein or meat substitute.
How do I store leftovers?
Store any leftover sliders in an airtight container in the fridge for up to three days.
How long does it last?
These sliders are best enjoyed fresh but can be stored for up to three days, while the flavors meld even more.
A Cozy Closing Note
These Cheeseburger Sliders are not just a meal; they’re a delightful, comforting experience that brings everyone together. Whether you’re having a quiet family dinner or hosting friends for game night, this recipe is sure to create smiles all around. Save this Cheeseburger Sliders recipe to your easy weeknight dinner board so it’s ready when you need a cozy treat!